

Manage my cheap TLD with Route53
Welcome
While writing a post about setting up Keycloak,
which should be live this month(it’s a bit harder, than I thought),
I decided that it would be great to use my custom domain and play
with it as well. As having sso.3sky.in looks cool, also unexpectedly it’s quite cheap. But why do I need it? It’s like 10$ per domain. Yes and no. One of the Community Builder program benefits is a voucher for 500$ which can be used within a year, on AWS services. On Route53 as well, but not on domains. After a short discussion on Slack with other builders, I realized that the cheapest method is to buy a domain wherever we want to, and then delegate it to Route53, as this cost is covered by the program. Sounds like a plan right? So how to do it? First please read this docs, then let’s try to do it with AWS CDK.
Step 1: Get your current DNS configuration from the current DNS service provider (optional but recommended)
Uff, as I’m using a brand new, cheap domain I can just skip this step!
Step 2: Create a hosted zone
That’s a very important step, as well as a few points:
- You can create a hosted zone only for a domain that you have permission to administer
- Route 53 automatically creates a name server (NS) record and a start of authority (SOA) record for the zone
- Don’t create additional name server (NS) or start of authority (SOA) records Also, this step can be handled via CDK, so here is the code.
import * as cdk from 'aws-cdk-lib';
import { Construct } from 'constructs';
import * as route53 from 'aws-cdk-lib/aws-route53';

export class CheapZoneStack extends cdk.Stack {
  constructor(scope: Construct, id: string, props?: cdk.StackProps) {
    super(scope, id, props);

    const hostedZone = new route53.HostedZone(this, 'HostedZone', {
      zoneName: '3sky.in',
      comment: "Testing domain for AWS projects"
    });
  }
}
Step 3: Create records
No need, as we covered this elsewhere.
Step 4: Lower TTL settings
This will be later as part of point 7. With note about value:
- AWS recommends that you specify a value between 60 seconds and 900 seconds (15 minutes).
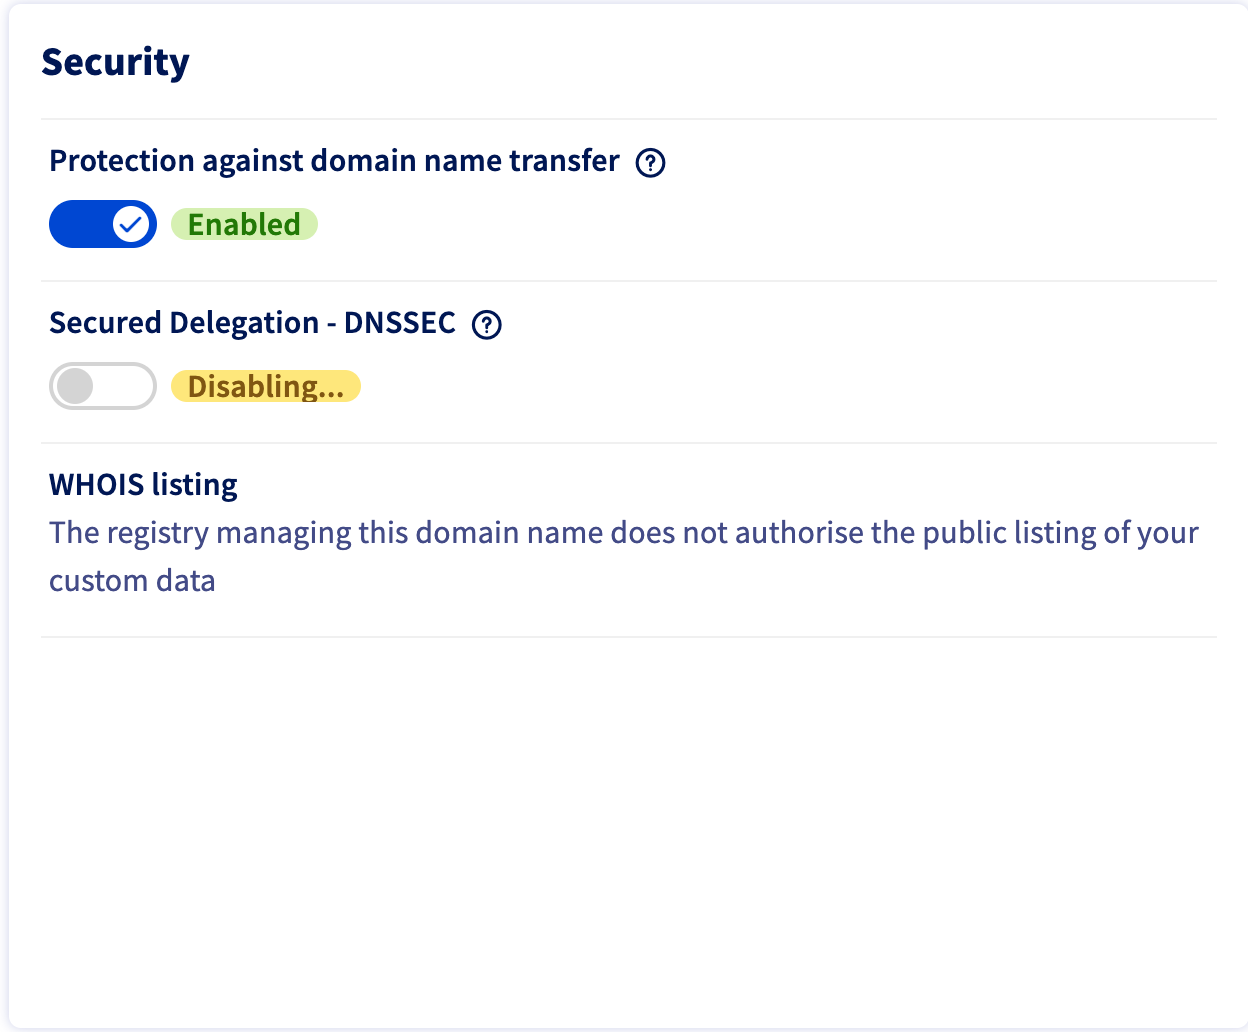
Step 5: Remove the DS record from the parent zone
That needs to be checked, in my case I need to do it as it’s a free-of-charge service provided by OVH.com. And it’s very easy to archive.
- Go to https://www.ovh.com/manager/#/web/domain/<your-domain>/information
- Uncheck DNSSEC
 |
|---|
Step 6: Wait for the old TTL to expire
Here again, our domain is fresh so no need to wait.
Step 7: Update the NS records to use Route 53 name servers
That’s the step that can be partly covered via code, part of it we should do manually.
for (let i = 0; i < 4; i++) {
  new cdk.CfnOutput(this, `nameServers${i + 1}`, {
    value: hostedZone.hostedZoneNameServers ? cdk.Fn.select(i, hostedZone.hostedZoneNameServers) : 'UNDEFINED',
  });
}
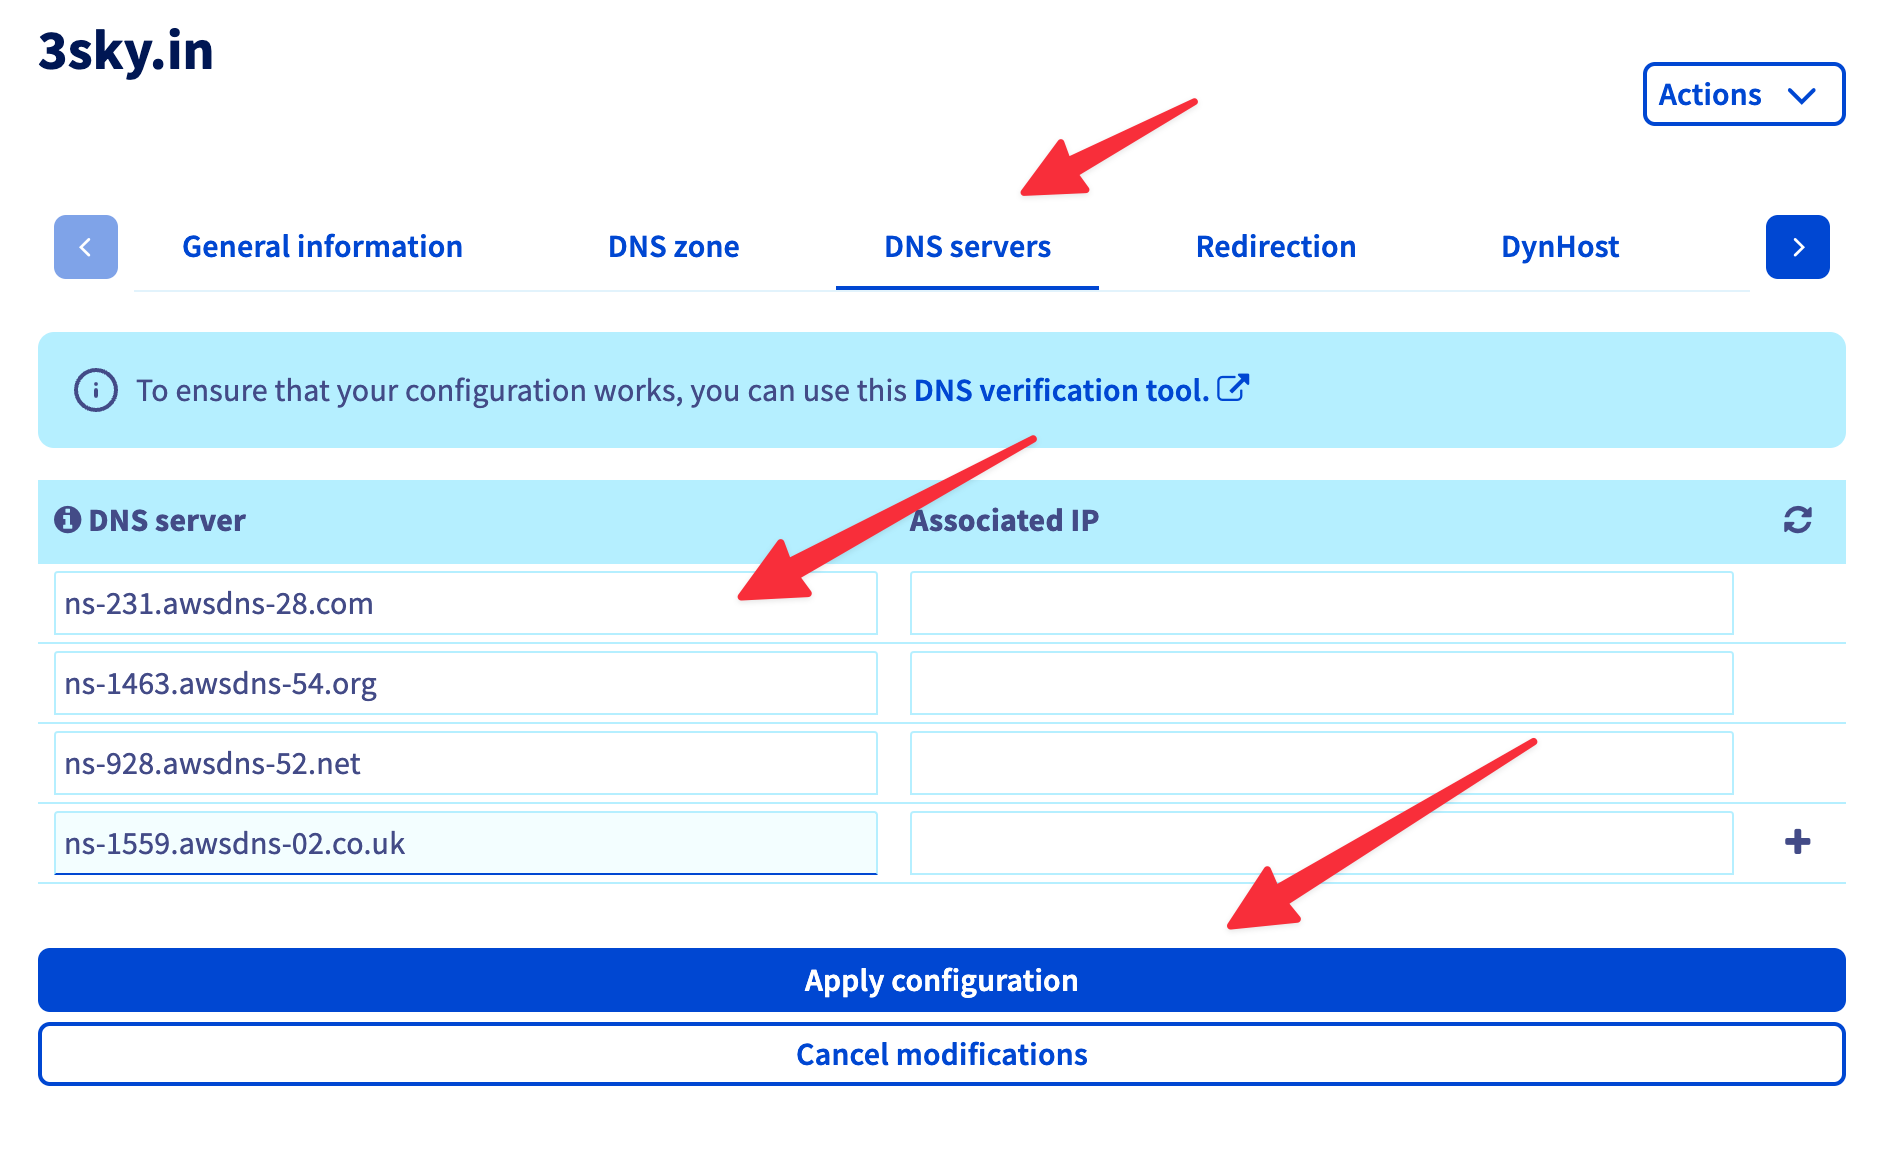
Then, we can use our output to change NS on our domain provider site(OVH in my case).
- Go to https://www.ovh.com/manager/#/web/domain/<your-domain>/dns
- Change variables based on red lines
 |
|---|
Step 8: Monitor traffic for the domain
In our case, we just would like to check if it’s working. To provide a fast check, let’s add a record in type CMAKE that will redirect google.3sky.in to https://duckduckgo.com/. We can do that by adding DNS record as well as code.
new route53.CnameRecord(this, 'TestCname', {
  recordName: 'google',
  zone: theZone,
  domainName: 'https://duckduckgo.com/',
});
Then after a while, I should be able to see:
$ dig +short NS 3sky.in
ns-1559.awsdns-02.co.uk.
ns-928.awsdns-52.net.
ns-1463.awsdns-54.org.
ns-231.awsdns-28.com.

$ dig +short  google.3sky.in
https://duckduckgo.com/.
Good!
Step 9: Change the TTL for the NS record back to a higher value
As it’s a testing domain, there is no reason to hold a 2-day TTL. Let’s keep 900 seconds.
Step 10: Transfer domain registration to Amazon Route 53
As the goal here was to go cheap, we will skip this part.
Step 11: Re-enable DNSSEC signing (if required)
Ok, but what’s the DNSSEC? In one line it adds a layer of trust on top of DNS by providing authentication. If you’re more interested in the topic, here is the longer description from Cloudflare(https://www.cloudflare.com/dns/dnssec/how-dnssec-works/). When you know, what is it, you probably would like to enable it. However it’s not tested, I skipped it personally.
[...]
const kmsKey = new kms.Key(this, 'KmsCMK', {
  keySpec: kms.KeySpec.ECC_NIST_P256,
  keyUsage: kms.KeyUsage.SIGN_VERIFY,
});

hostedZone.enableDnssec({ kmsKey });
Bonus: email spoofing protection
As it’s a testing domain, we could be interested in email spoofing protection, to do that we need to add 3 new TXT records, fortunately, it’s very easy, however, remember - it’s no email setting.
new route53.TxtRecord(this, 'spf', {
  recordName: '3sky.in',
  zone: hostedZone,
  values: ['v=spf1 -all'],
});

new route53.TxtRecord(this, 'dkim1', {
  recordName: '*._domainkey',
  zone: hostedZone,
  values: ['v=DKIM1; p='],
});

new route53.TxtRecord(this, 'dmarc', {
  recordName: '_dmarc',
  zone: hostedZone,
  values: ['v=DMARC1; p=reject; sp=reject; adkim=s; aspf=s;'],
});
Summary
And that’s all. Rather straightforward procedure, which helps me manage my cheap TLD with Route53. Is it useful? For me yes, integration with AWS services will be much simpler and faster too. In general is it worth it? Depends on the use case. For bigger organizations, money isn’t a problem, but sometimes they have already trusted domain providers, or multi-cloud setup, then NS delegation, only for AWS-related TLDs could be a good idea.